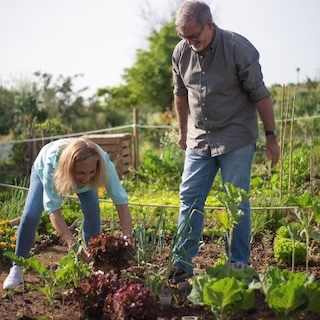
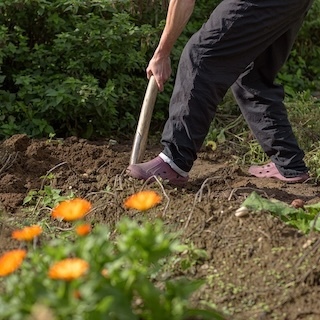
All content on this site is my sole creative property and may not be reproduced. If you would like to feature, pin or otherwise refer to content of mine, thank you! Please clearly link back to 'A Nest for All Seasons' and only use up to two photographs. To purchase content, please e-mail me for rates and restrictions.

17 May 2013

Redbud Lauren at The Thinking Closet

Pin It

The Redbud Series at the Nest is sponsored by Amazon affiliate links.  THANK YOU for your purchases Nest readers!

So if you haven't met Lauren yet, you haven't met your new best friend. (Alison Rosen anyone? no?) Ok, well, here is the thing.  Lauren is one of those girls that just instantly attracts people to her.  She is that girl you want to be your best friend that actually WILL BE your best friend.  She comes across on her blog as kind and friendly, approachable and wonderfully creative.  She is inspiring and brilliant with her DIYs, but her personality is definitely what gets folks to stick around.  She is one of those bloggers that you just stop by to read once in awhile because you are having a bad day and need a little happy joy in your life.  I told you - you WANT her to be your new best friend.


Wondering what the heck a redbud is here at the nest?  Read THIS POST to get started!

Meet Redbud Lauren:

Now moving on to those awesome DIY's I was telling you about.  I found Lauren on Looksi because of THIS POST where she came up with the most FABULOUS new mom gift.  Brilliant I tell you!  (Those post-it notes on the diapers are just AWESOME).


...but the DIY gifts just kept coming.  There was the leather painted purse:


...and then back in the archives came these cute little burp cloths:


...and this adorable banner (with a free cut file!):


Y'all it just keeps going and going and going.  You WANT to know this girl, I am telling you! 
 Go say hey to Miss Lauren, like her on facebook or give her a little comment love.  You will fall in love - I promise!


15 May 2013

Craft Lightning and Behind the Scenes for Hobby Farm Home

Pin It

DIY Canning Jar Toppers is sponsored by Tombow Pencils and Amazon Affiliates.

So yesterday, we talked about how easy it is to make a redbud or lilac jelly (or ANY floral jelly for that matter!).  Today, we are going to talk about how to gift them.  I am participating in Craft Lightning this week, so today's little gift craft will take no more than 15 minutes!
(PS -- Creating the jelly itself only takes about 15 minutes as well, minus the 24 hours waiting time!!)

So basically, we are just going to spice up the jars a little bit.  I used this same technique in my feature article in Hobby Farm Homes this month (Check out the issue for recipes on making your own homemade condiments -- including perennial picnic favs like ketchup, mustard,and BBQ!)


The topper is so simple it can barely be called a craft, but totally transforms the jars into little rustic gifts instead of just a can of something, you know?  Simply cut a circle of burlap (ragged edges are awesome!) and secure it with a piece of raffia or twine.  I used a bleached burlap and basic brown garden sisal for mine, but you could certainly change up the colors for different looks!

14 May 2013

How to Make Redbud and Lilac Jellies

Pin It

How to Make Redbud and Lilac Jellies is sponsored by the amazing blooming garden outside my window and Amazon Affiliates.

Last year about this time, I made a peach pie with redbuds and wrote a piece for Dearest Nature exhorting the amazing goodness of redbuds as little edible garnishes.  About that same time, I really wanted to make a redbud jelly, but alas, I waited too long.  The redbuds had already started falling from the branches and there were not enough left to can.  I determined that redbud jelly would be on the list FOR SURE this spring and today I bring you the result!

Supplies:

Redbuds (and Lilacs -- see below!)
Canning Jars
Fresh Canning Lids
Boiling Water
Sugar
Lemon Juice
Unflavored Pectin (This is what makes jelly JELLY!)

*Highlighted products are linked to Amazon for your perusal

Step #1  

The process is simple really.  Pick the flower buds from the branches when they are in bloom (Zone 5, you have about another week to get them I presume!) and simply place them into a jar.  Rinse once to get rid of dirt, but do this quickly and only once as the color leaches quickly!

Step #2  

Poor boiling water over the buds in the canning jar.  Let the can sit for 24 hours.  (PS - USE a canning jar as they are made for super high heat!)


Notice how the color starts leaching almost immediately out of the buds.  It is kind of amazing!  


See that purple can hiding back there behind the redbuds?  Those would be lilac buds.  While I was out gathering redbuds, I saw the lilacs were in bloom and thought I would go ahead and make both.  The process is the same -- just different flowers!  


Surprisingly, my variety of lilacs gave me almost the exact same color as the redbuds.  Shocking how it went from bright and deep purple to saturated PINK!  Maybe it knew we were celebrating news of a new baby GIRL!! ;)


Moving on in the process though....

Step #3

Once the buds have sat for 24 hours, simply strain the liquids into a fresh jar, squeezing the buds to get out all the color and flavor you can!  Isn't it a beautiful color??


Step #4

Once you have your flavored floral liquids, you will choose between an instant pectin and a classic pectin.  You are supposed to be able to stir the instant pectin and sugar in, stir for 3 minutes then chill, but it did not work that well for me.  I had much better luck with the CLASSIC pectin.  The process is still very simple.  The classic just needs heating.  

Step #5

For classic pectin, add your liquid to a pot, add sugar, pectin (it looks like the powder in Jello!) and enough water to get up to the ratios listed on the pectin packaging.  Also add in 1 T of lemon juice to add a little bite to the floral flavor.   Heat to a boil, constantly stirring, turn heat down and stir for 3 minutes.  Decant into a jar, chill and voila!  You are done!


It honestly is just as simple as making Jello, so if you have mastered Jello, you can master any floral jellies!  (...and pst....don't tell the canning aficionados  but these are SOOOOOOOOOOOO much easier than fruit jellies where you have to pit, clean, hull and smash the fruit!  Go flowers!)

Want to see how I top these jars of jelly off for gifting?  (Psst -- it costs just a few pennies!) CLICK HERE for my secrets!


Pin It

For those of you that love-love-love canning, I've assembled my favorite tools, supplies and book for you below. If you choose to click over to Amazon and purchase these or any other product, I will receive a small bit of compensation. Every little bit helps and I appreciate you supporting A Nest for All Seasons with your everyday Amazon buys! THANK YOU!

10 years buttonredbuds buttonwhat do you do button pppcalendar button
 
--------------------------------------------------------------------------------------------------------------------------------------------------------------------------------------------------